How to Create a Beverage Can Mockup in Adobe Photoshop
Adding a label to a contoured surface such as an aluminum can may be difficult if you don’t know how to do it.
In this post, I will show you how to create a beverage can mockup in Adobe Photoshop, which is ideal for product shots for social media, website, investor decks, etc.
To add a label on a can in Photoshop, you need two things:
A can
A label
You can get cans using AI or stock image sites such as Adobe Stock Images.
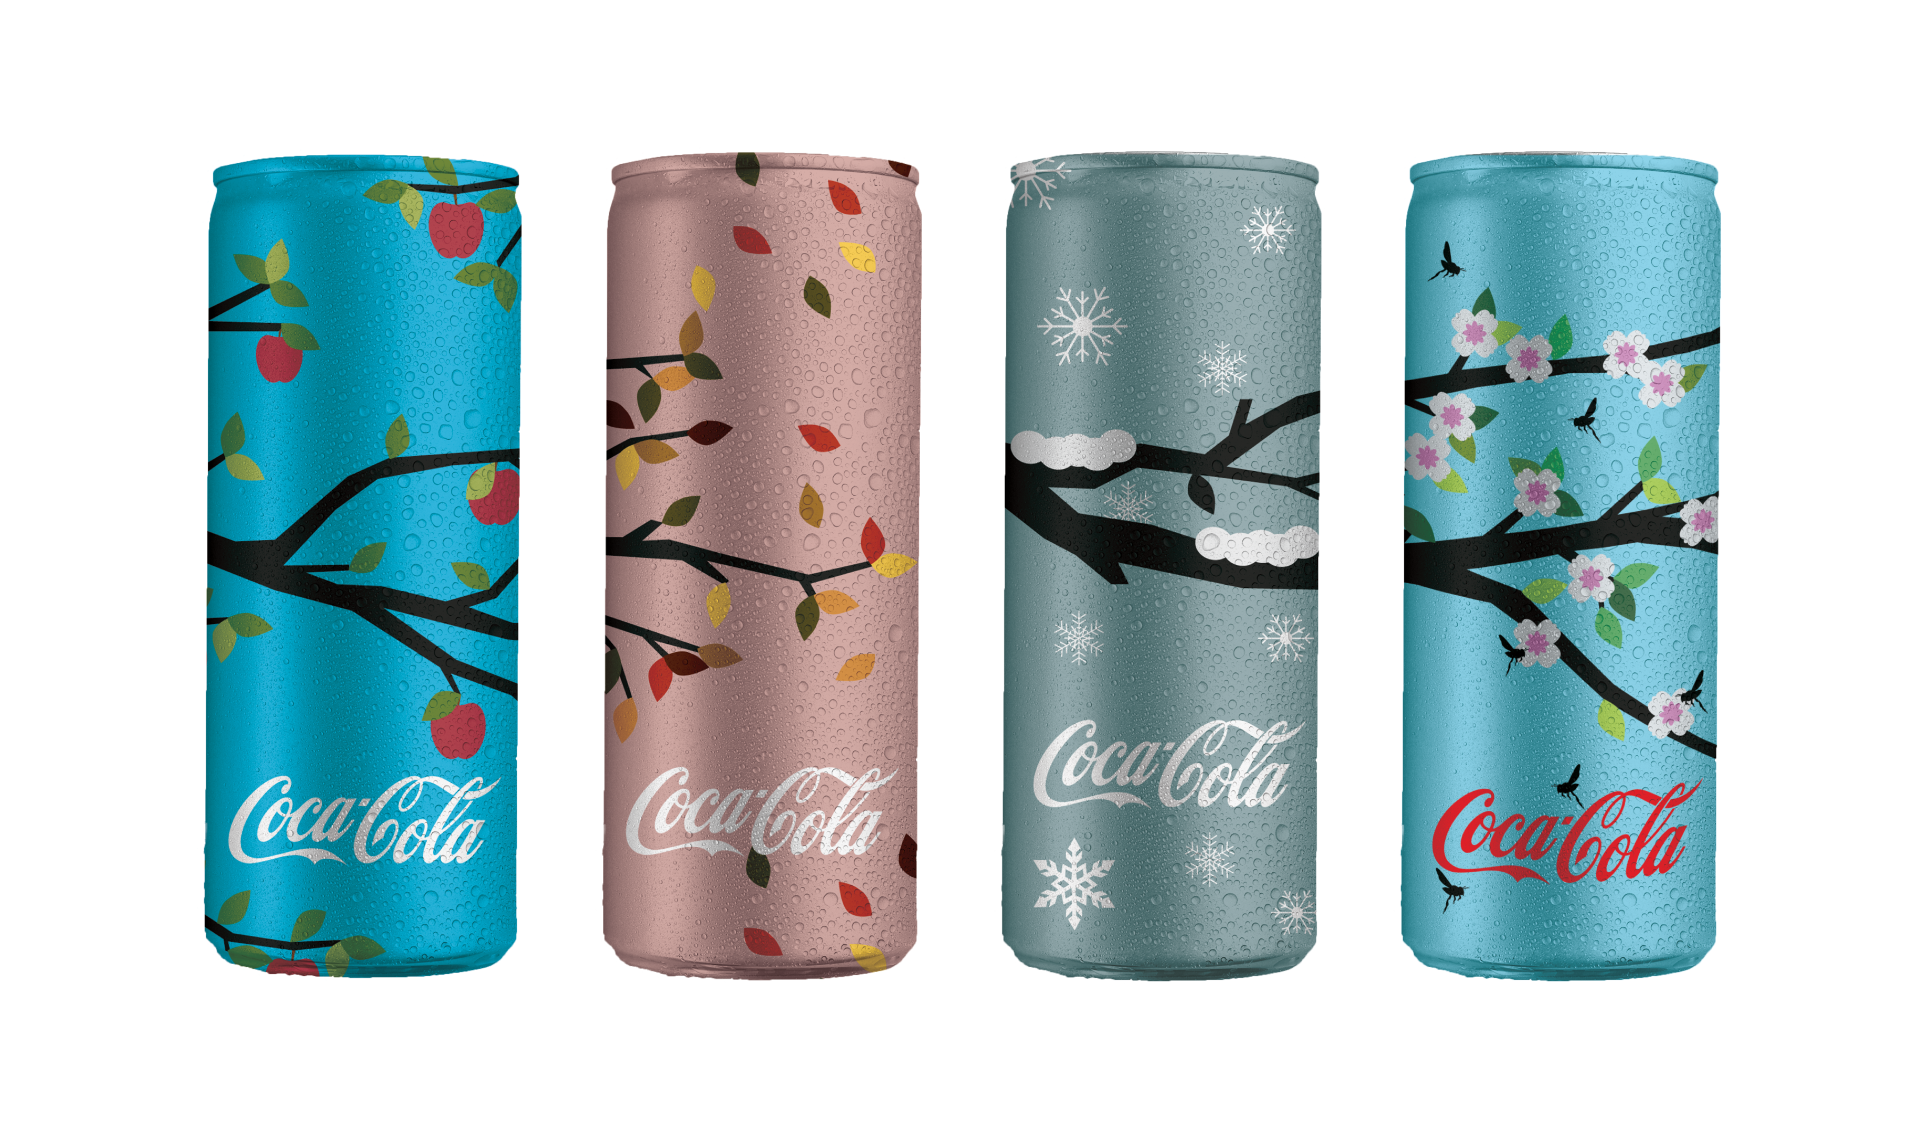
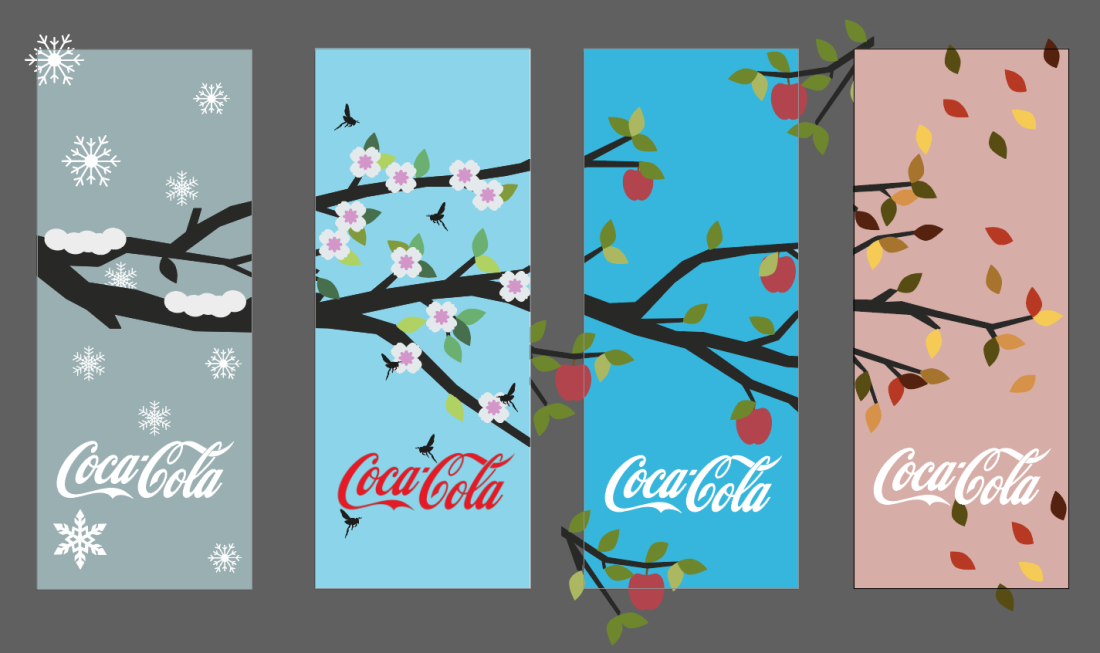
As for the label, you can design that in any design program you want. For this example, I designed mine in Adobe Illustrator.
As you can see, they are just flat images the same size as the can.
As for your can, ensure that it is isolated from the background. In my example, I don’t have a background so I don’t need to do this step. But for this tutorial to work, it needs to be separate from the background and be on its own layer.
Bring in your label and place it above your can layer. Ensure that it is sized and aligned as needed.
Right click the label and select ‘Create Clipping Mask’. This will allow the label to take the shape of the can. If your can is not isolated from the background, it won’t work. Notice how the label, while taking the shape of the can, doesn’t look realistic. It still looks flat. We’ve lost all the contour, the condensation marks, as well as all the shadows and highlights.
Select the can and duplicate it (hold Alt and drag it above the label).
Choose blending mode – Linear Burn, and adjust the opacity by 70%. This will lower some of the darker tones.
Select the label and press Ctrl T > Right click > Warp > Arc Lower (upper menu bar), and adjust as needed. This will allow any text or logos you may have on the can to take the contoured shape and look more realistic.
You can add further sheen if you’d like by selecting the paint brush tool, compressing it to make a slender vertical shape. Ensure you have white colour selected and your edge is feathered.
Add an adjustment layer.
Add a paintbrush stroke on the label and adjust the position as needed. You may want to lower the opacity by 70% to allow some of the background label to bleed through and look a little more natural. You may also want to duplicate it and add another one so you have a sheen on both edges of the can.
Hope this helps. If any of the steps were unclear, please reach out or watch my tutorial video.
Need help with your marketing activities?
If you’re looking to make a move with your marketing, reach out to us. We are priced fairly, we’re straight shooters, and are the very best at what we do.